There is a red Grag’ohr in the room when the elevator goes up from the previous level.
Dodge immediately by holding down the “D” key. Time the third shot when he will begin to reload and kill him. Loot his HOVER BOMB.
Above you will notice a door on high ground, and a green shirt prisoner. That room will be accessible later when you get a LEVITATOR.
In the next room, hold down the UP ARROW key immediately to dodge the Whar’ork and his whip. Press the PAGE UP key to browse through your inventory. Select the HOVER BOMB and throw it. Loot his BRIDGE KEY.
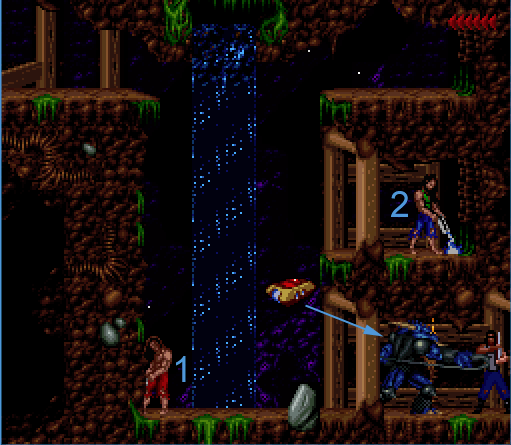
Prisoner # 1 says: “Curse this terrible life.”
Climb the wall. There Prisoner # 2 says: “Have you seen my brothers? They are hiding.” Climb the wall up to the higher ground. Stand around the middle. Hold the “D” button to run, and press the SPACE BAR to long jump across the pit to the other side.
The next room has a red Grag’ohr and a spider mine. Spider mines can’t be shot. Only HOVER BOMBS or other type of bombs may destroy them, but that’s a waste of resources. Instead, hold down the UP ARROW key to dodge and hide. Shoot the red Grag’ohr whenever you have an opportunity.
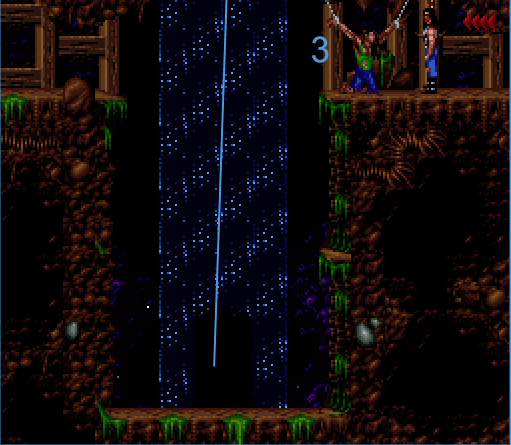
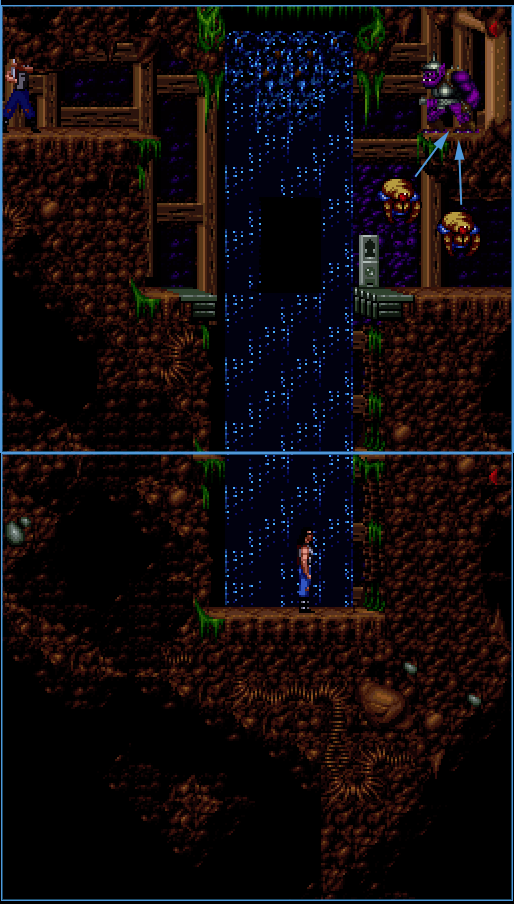
You will find now a keyhole. Stand on top of it and press the UP ARROW to automatically make use of the BRIDGE KEY. The bridge will extend, allowing Kyle to walk to the next side of the room. Position Kyle beneath the high ground’s ledge. Press the UP ARROW key to climb up.

The green-shirt prisoner# 3 says: “I’m so hungry.” Stand on the ledge next to him and press the DOWN ARROW key to climb down. At the bottom, stand in the middle of the waterfall. There is a hidden room behid the waterfall. Press the UP ARROW key to enter through the door.
In the hidden room, you will find a switch plate on the ground. Make sure to jump to avoid triggering the turret gun.
Use a HOVER BOMB to destroy the metal door, and talk to the two prisoners. The green-shirt prisoner #5 will give you a BRIDGE KEY. He says: “Have you seen our brother?”
Kyle responds: “Yes, he is working in the mines.”
Prisoner: “Thank you. Take this key.”
Kyle: “Thank you, friend.”
The red-shirt prisoner #6 gives Kyle a HEALTH POTION.
Prisoner: “You must be the chosen one. Take this potion.”
Kyle: “Thank you, friend.”
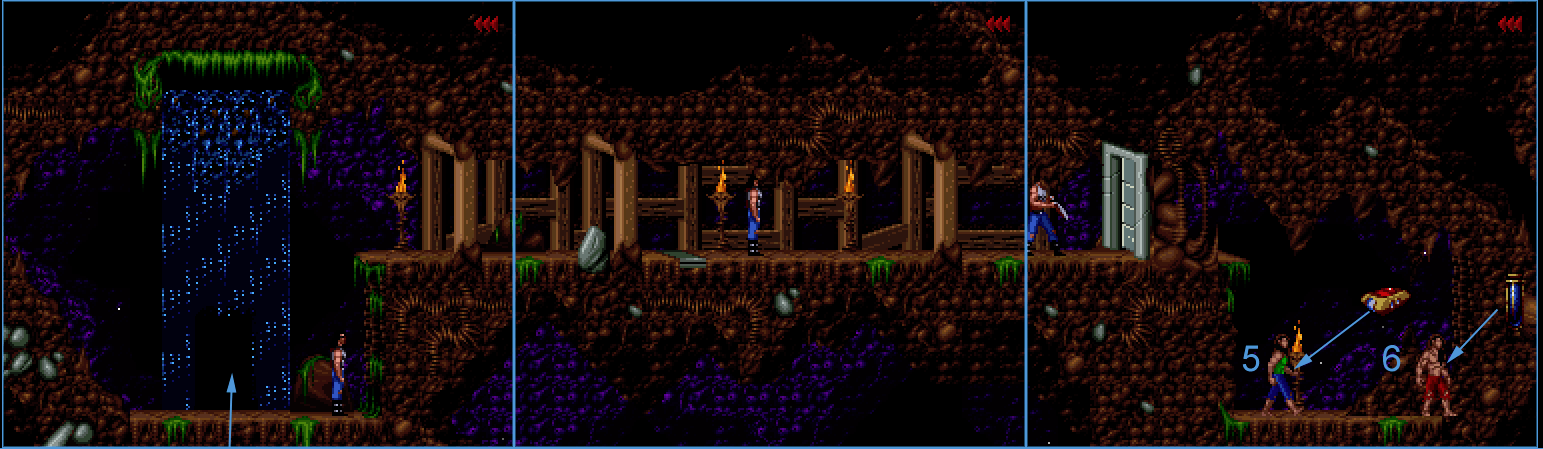
Exit the Hidden Room. Climb the right side of the pit. Stand a short distant east of the green-shirt prisoner # 3. Hold down the “D” key to run, then press jump as you reach the ledge to long jump across the pit.
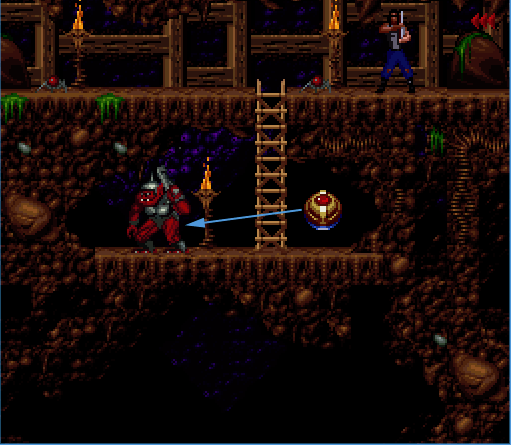
The next room has two spider mines on patrol-mode. Hold down the UP ARROW key to dodge/hide against the wall to let the spider mine walk past Kyle. Then move toward the ladder.
Kyle can’t go down the ladder while carrying the shotgun so hit the “S” key or the “D” key to sheathe the weapon.
Press the DOWN ARROW key to let Kyle climb down the ladder.
As soon as Kyle hits the floor press the UP ARROW key to dodge. When the red Grag’ohr shoots three times and begins to reload press the “F” key to shoot.
Loot the HOVER BOMB from him. Go back up the ladder by pressing the UP ARROW.
Press the UP ARROW to dodge the next spider mine. Don’t rush out to the west. There is a pit and Kyle might fall.
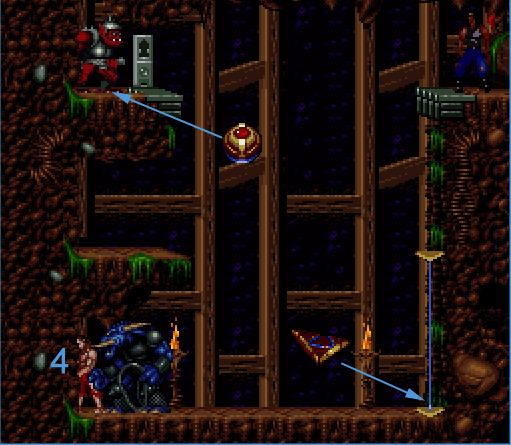
Hold down the UP ARROW key to dodge. As you can see on the other side of the room across the pit there is a red Grag’ohr that will shoot Kyle in a couple of seconds. Kill it.
Stand on the ledge and press the DOWN ARROW key to fall on top of the LEVITATOR.
Press the PAGE UP key to browse your inventory. Pick a HOVER BOMB. Jump down off the LEVITATOR and throw the HOVER BOMB at the Whar’ork before he hits Kyle with the whip. He won’t drop loot. Go back and loot the LEVITATOR that’s on the right side. You will need it later.
The Prisoner # 4 says: “If only I could steal a LEVITATOR.”
Now go all the way back to the first room of Level 4 — by the elevator. You will notice above you a narrow shaft. Stand beneath and experiment. Press the PAGE UP key to browse the inventory and pick the LEVITATOR. Press the “E” key to use the LEVITATOR. Press the UP ARROW to extend up the LEVITATOR. See if you can now climb the higher ground. Otherwise keep placing the LEVITATOR in another spot until you can climb.
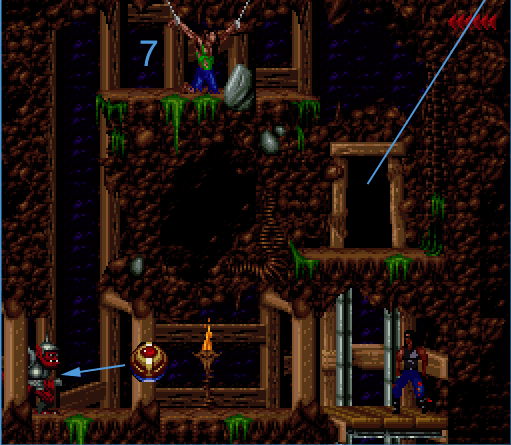
Prisoner #7 says: “UNNNNG” — not very talkative. Might be the chains and the hunger. Good ol’ Kyle doesn’t seem to offer any food nor breaks his chains oddly. Rant aside, go down and enter the doorway.
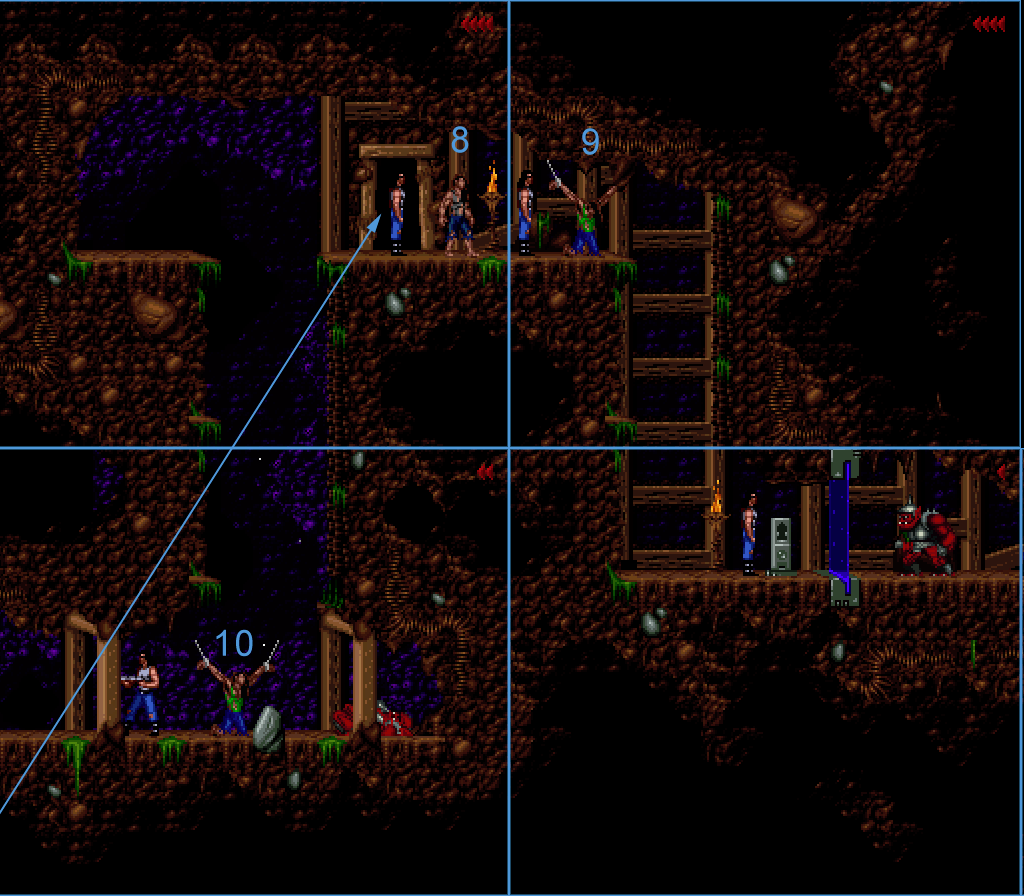
Once on the other side, there is a gray-shirt prisoner# 8. Walk next to him to trigger a conversation.
Prisoner: Word travels fast of your deeds to defeat Sarlac. Take this weapon friend. It was stolen from a guard. It is more powerful than what you are carrying.
Kyle: I will remember those that helped in Sarlac’s defeat. Farewell.
The room to the right has prisoner #9. All he says is “Curse Sarlac!”
Don’t bother going east. At the bottom of the pit is a laser field that won’t let you move forward.
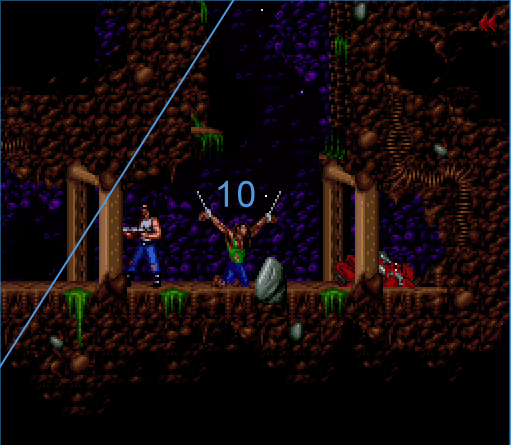
In the previous image, you may see how the pit looks like on the west side. By the prisoner #8, head west. Stand by the ledge, but don’t climb down. Jump across the pit. There you can climb down the pit safely.
At the bottom, there is a red Grag’ohr. Chances are Prisoner #10 will die when you press the UP ARROW to dodge his bullets. This one has no loot.
In case you wonder, Prisoner #10 says: “I am so hungry.” Poor soul doesn’t even suspect he’s about to get shot for you.
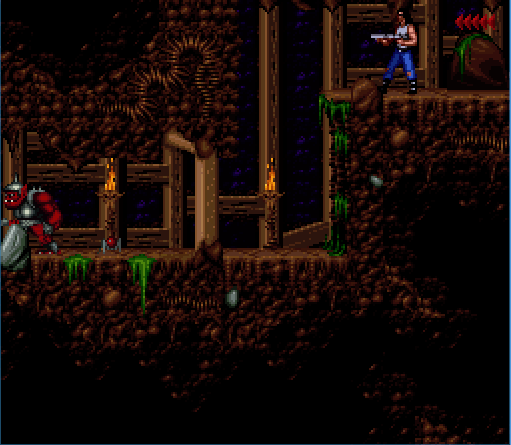
Next room has another red Grag’ohr. In the image below you can see Prisoner #11. Dispatch the red Grag’ohr. He has no loot. Stand near the doorway, hold down the “D” key to run, and press the SPACE BAR to long jump across the pit. Don’t bother climbing down that pit. There is nothing.
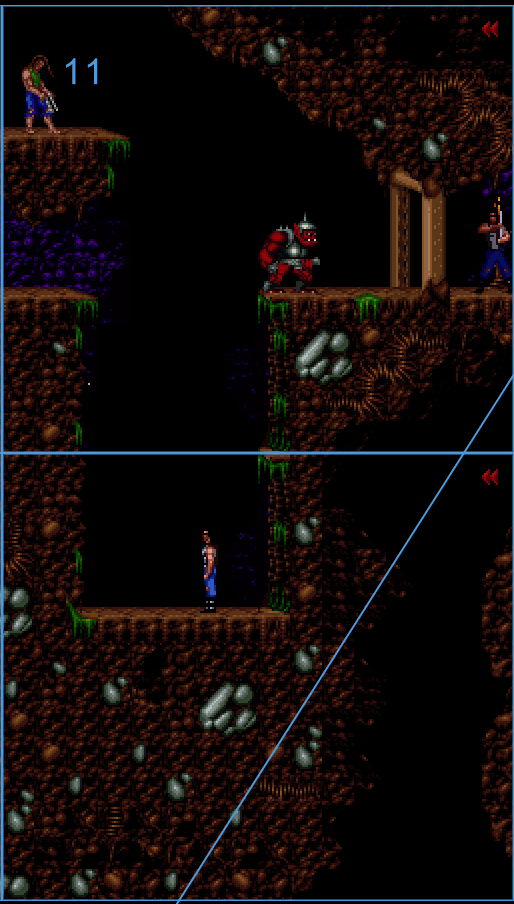
The next room has two pits, so be careful. These pits can be jumped normally without running. There is nothing neither pit. Don’t bother going up the ladder. That Whar’ork has no loot, and the Prisoner # 11 doesn’t provide any loot either.
Prisoner #11 says: “Curse this terrible life.”
Press the UP ARROW key in the next room. There is a Grag’ohr across the bridge about to shoot Kyle. Kill it. Stand by the keyhole mechanism and press the UP ARROW key to use the BRIDGE KEY.
No need to climb down the pit. There is nothing in there. Loot the IRON KEY from the dead red Grag’ohr. Now head back east all the way until you find the Laser Field blocking the path.
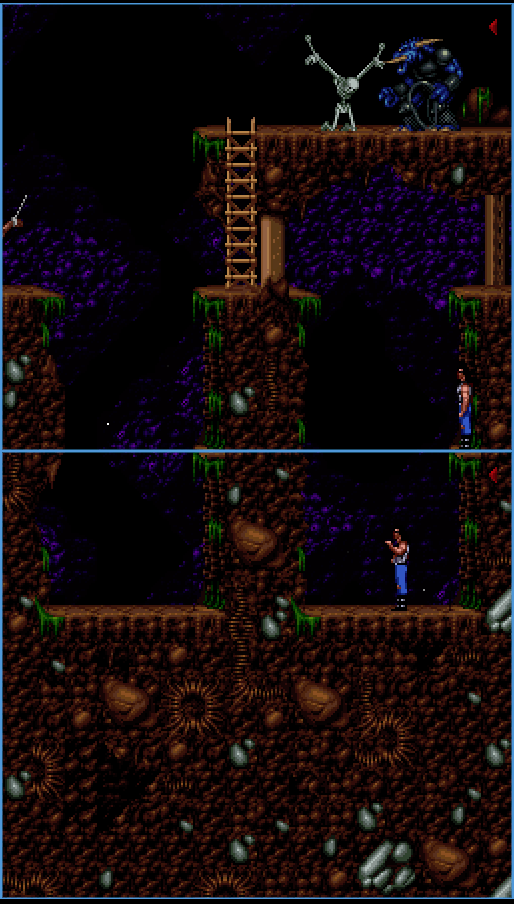
The next room has a purple Grag’hor. These are a bit harder than the green and red ones. After killing it, you have two options. Long jump across the bridge, or climb down, then climb up the other side. There is nothing in the pit below.
For some reason the BRIDGE KEY was used in the previous LASER FIELD, and now the bridge can’t be activated. Might be a bug Blizzard hasn’t fixed. Don’t forget to loot the dead purple Grag’hor. He has two bags which contain two REMOTE WASP. Climb down and head east. Don’t rush in. There is a LASER FIELD.
The IRON KEY will open the next LASER FIELD. Stand by the keyhole mechanism and press the UP ARROW key to disable it.
Once the LASER FIELD is disabled — WARNING: there is a bug here that hasn’t been fixed. Don’t jump down or Kyle dies. The bug makes Kyle fall a long pit and die.
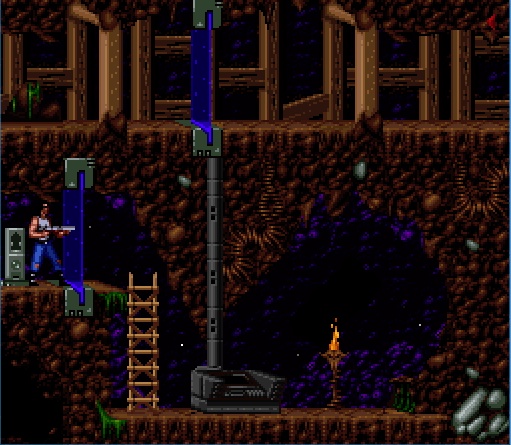
Press the PAGE UP key to browse your inventory and select the REMOTE WASP to destroy the GENERATOR.
Go back to the previous room, and climb up the area where the purple Grag’ohr is by pressing the UP ARROW key.
The LASER FIELD there was already disabled so you can now continue to navigate east.
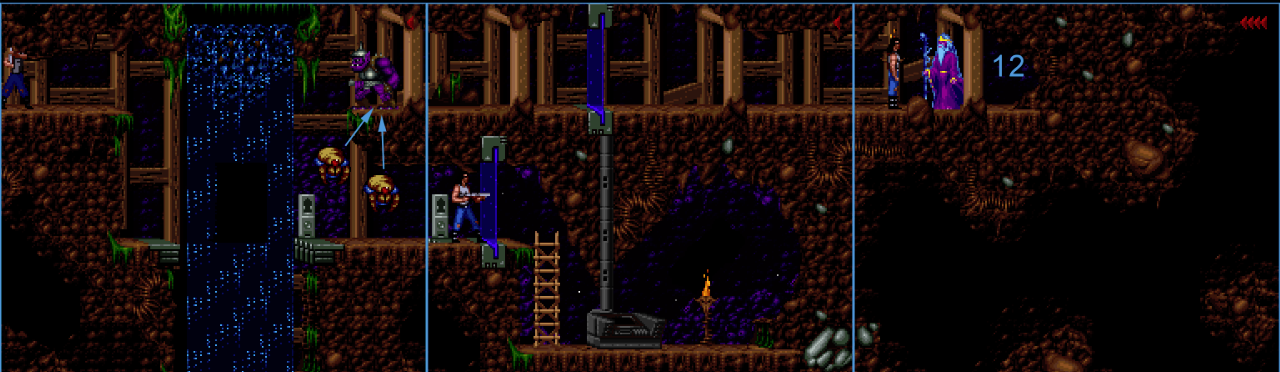
The next room is the exit where you meet up with Galadril.
Galadril: Kyle, it is good to see you again.
Kyle: Who are you?
Galadril: I am Galadril. Don’t you remember me?
Kyle: Was it you who sent me to Earth?
Galadril: Yes. And it was I who brought you back. Your destiny is at hand. You must find the seer, Onehand. If you fail in your quest all will be lost. I will help you as best I can. Go with speed.
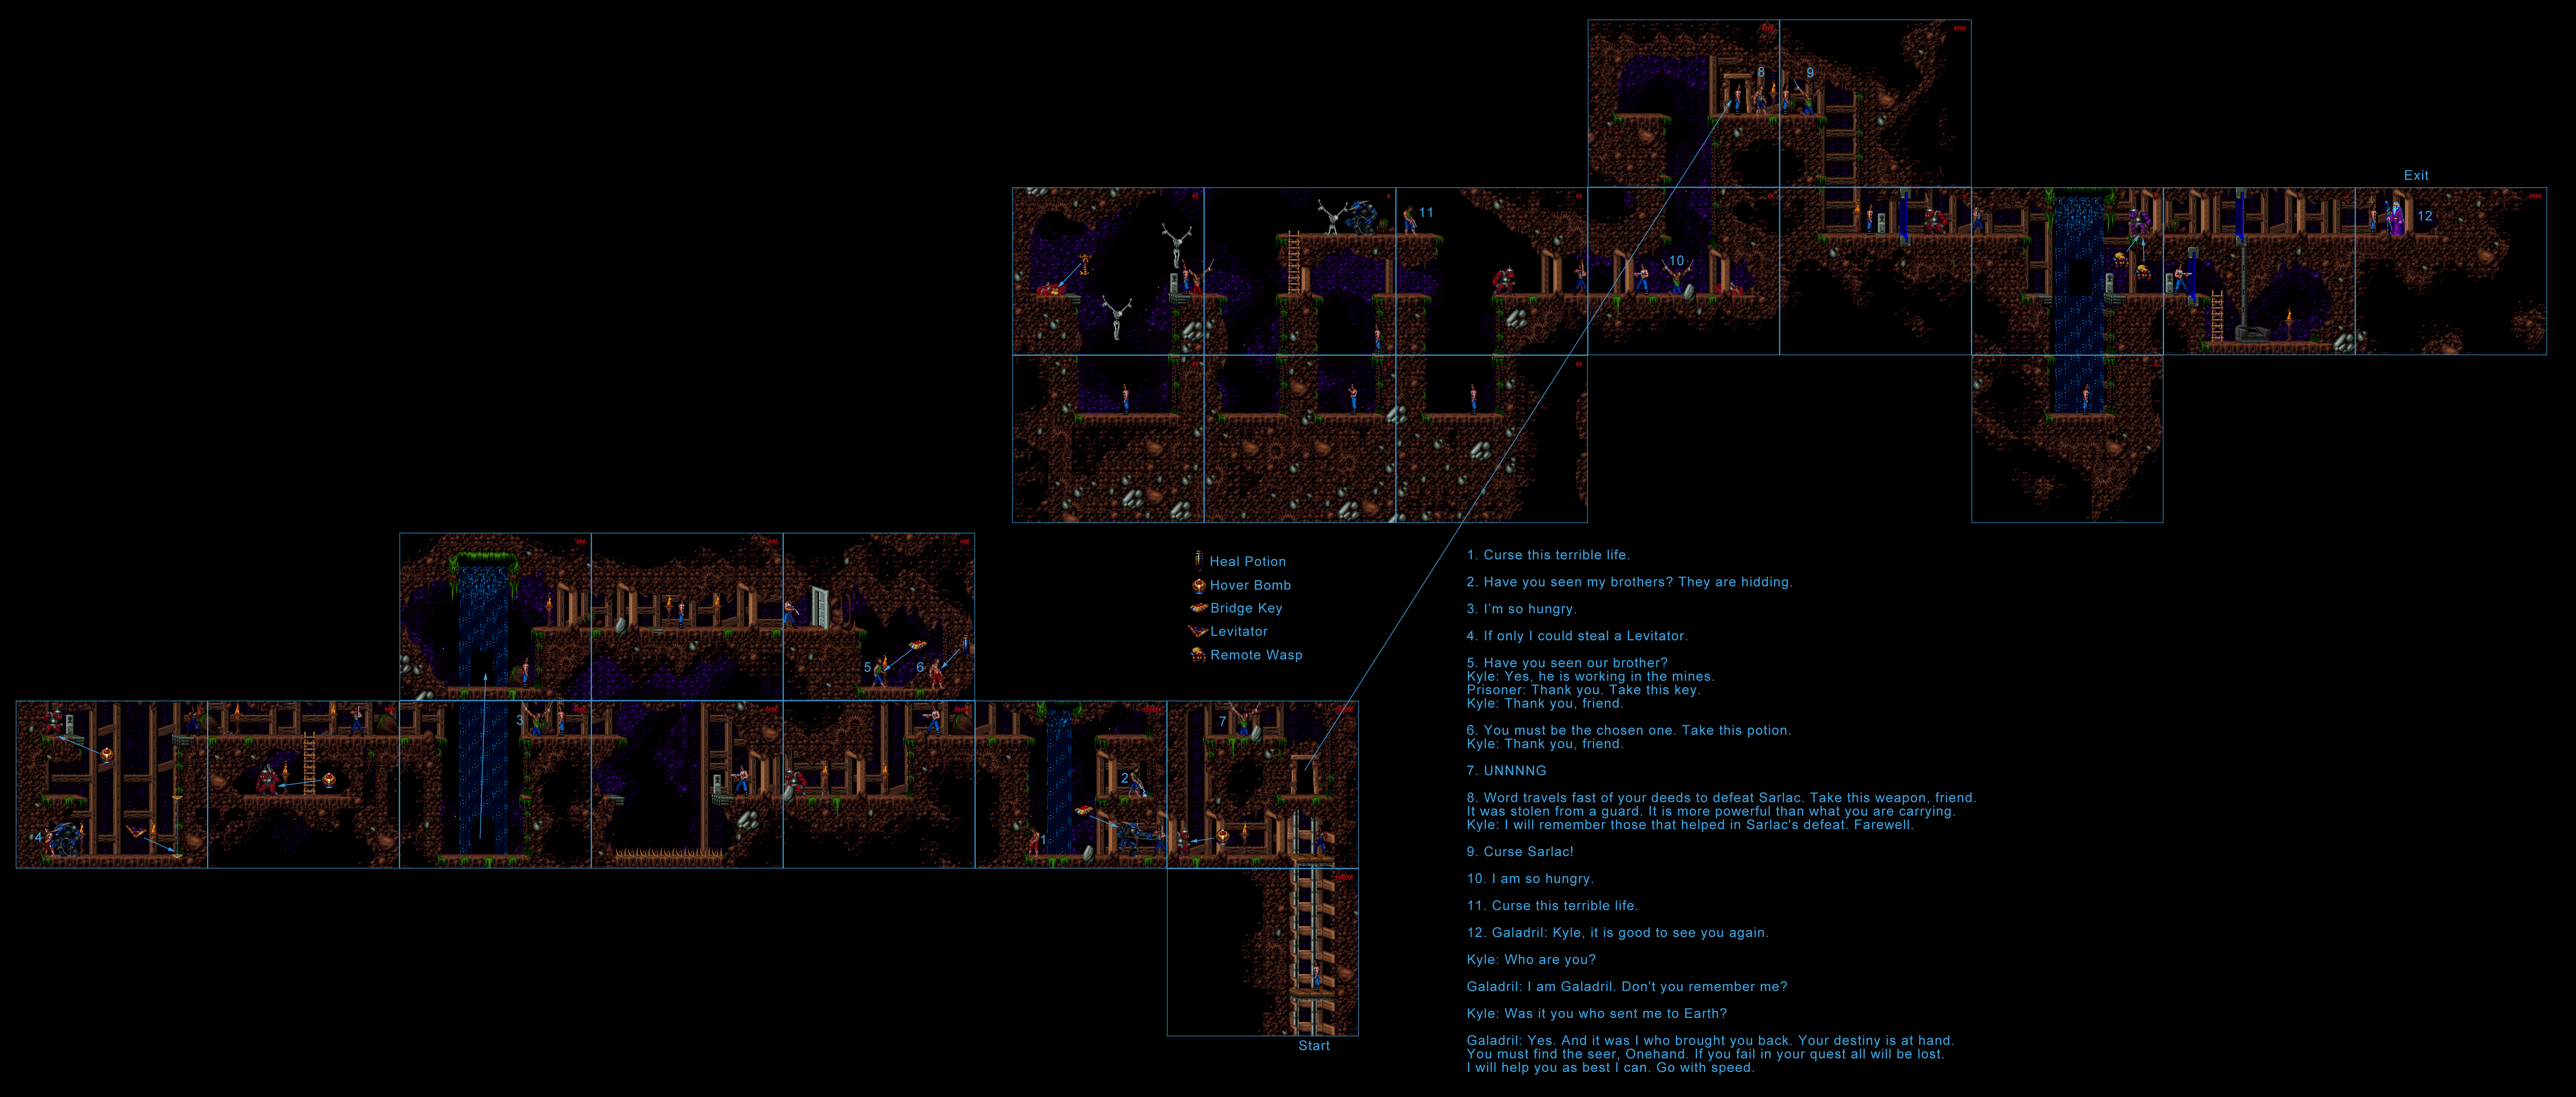
Walkthrough Map