After the game is saved, Kyle enters the Mines of Androth Level 2. Talk to the Androthian prisoner. He gives you a tip: “To escape bombs it is better to avoid them than to be nimble.” Do exactly as he says. Before you move to the next room press “F” to draw your shotgun.
As soon as you move into the next room, there is a red Grag’ohr. These throw Hover Bombs that roll throughout the floor toward you. Move back to the previous room. Now that you assessed the situation, go back in. The white round bomb will come at you again. You can escape it by keeping the “UP” arrow button held down which makes you dodge the bomb. It goes past Kyle without detonating.
The red Grag’ohr will now proceed to shoot his shotgun. This type of Grag’ohr will cock his shotgun to reload after one or two shots. As soon as you see the shotgun’s reload animation, accompanied by a loud “PEEKICK” sound effect, shoot him. He usually dies in two shots. He will drop a bag. Step over the bag and press the “DOWN” arrow button to pick it up. It contains a Hover Bomb which goes into your inventory.
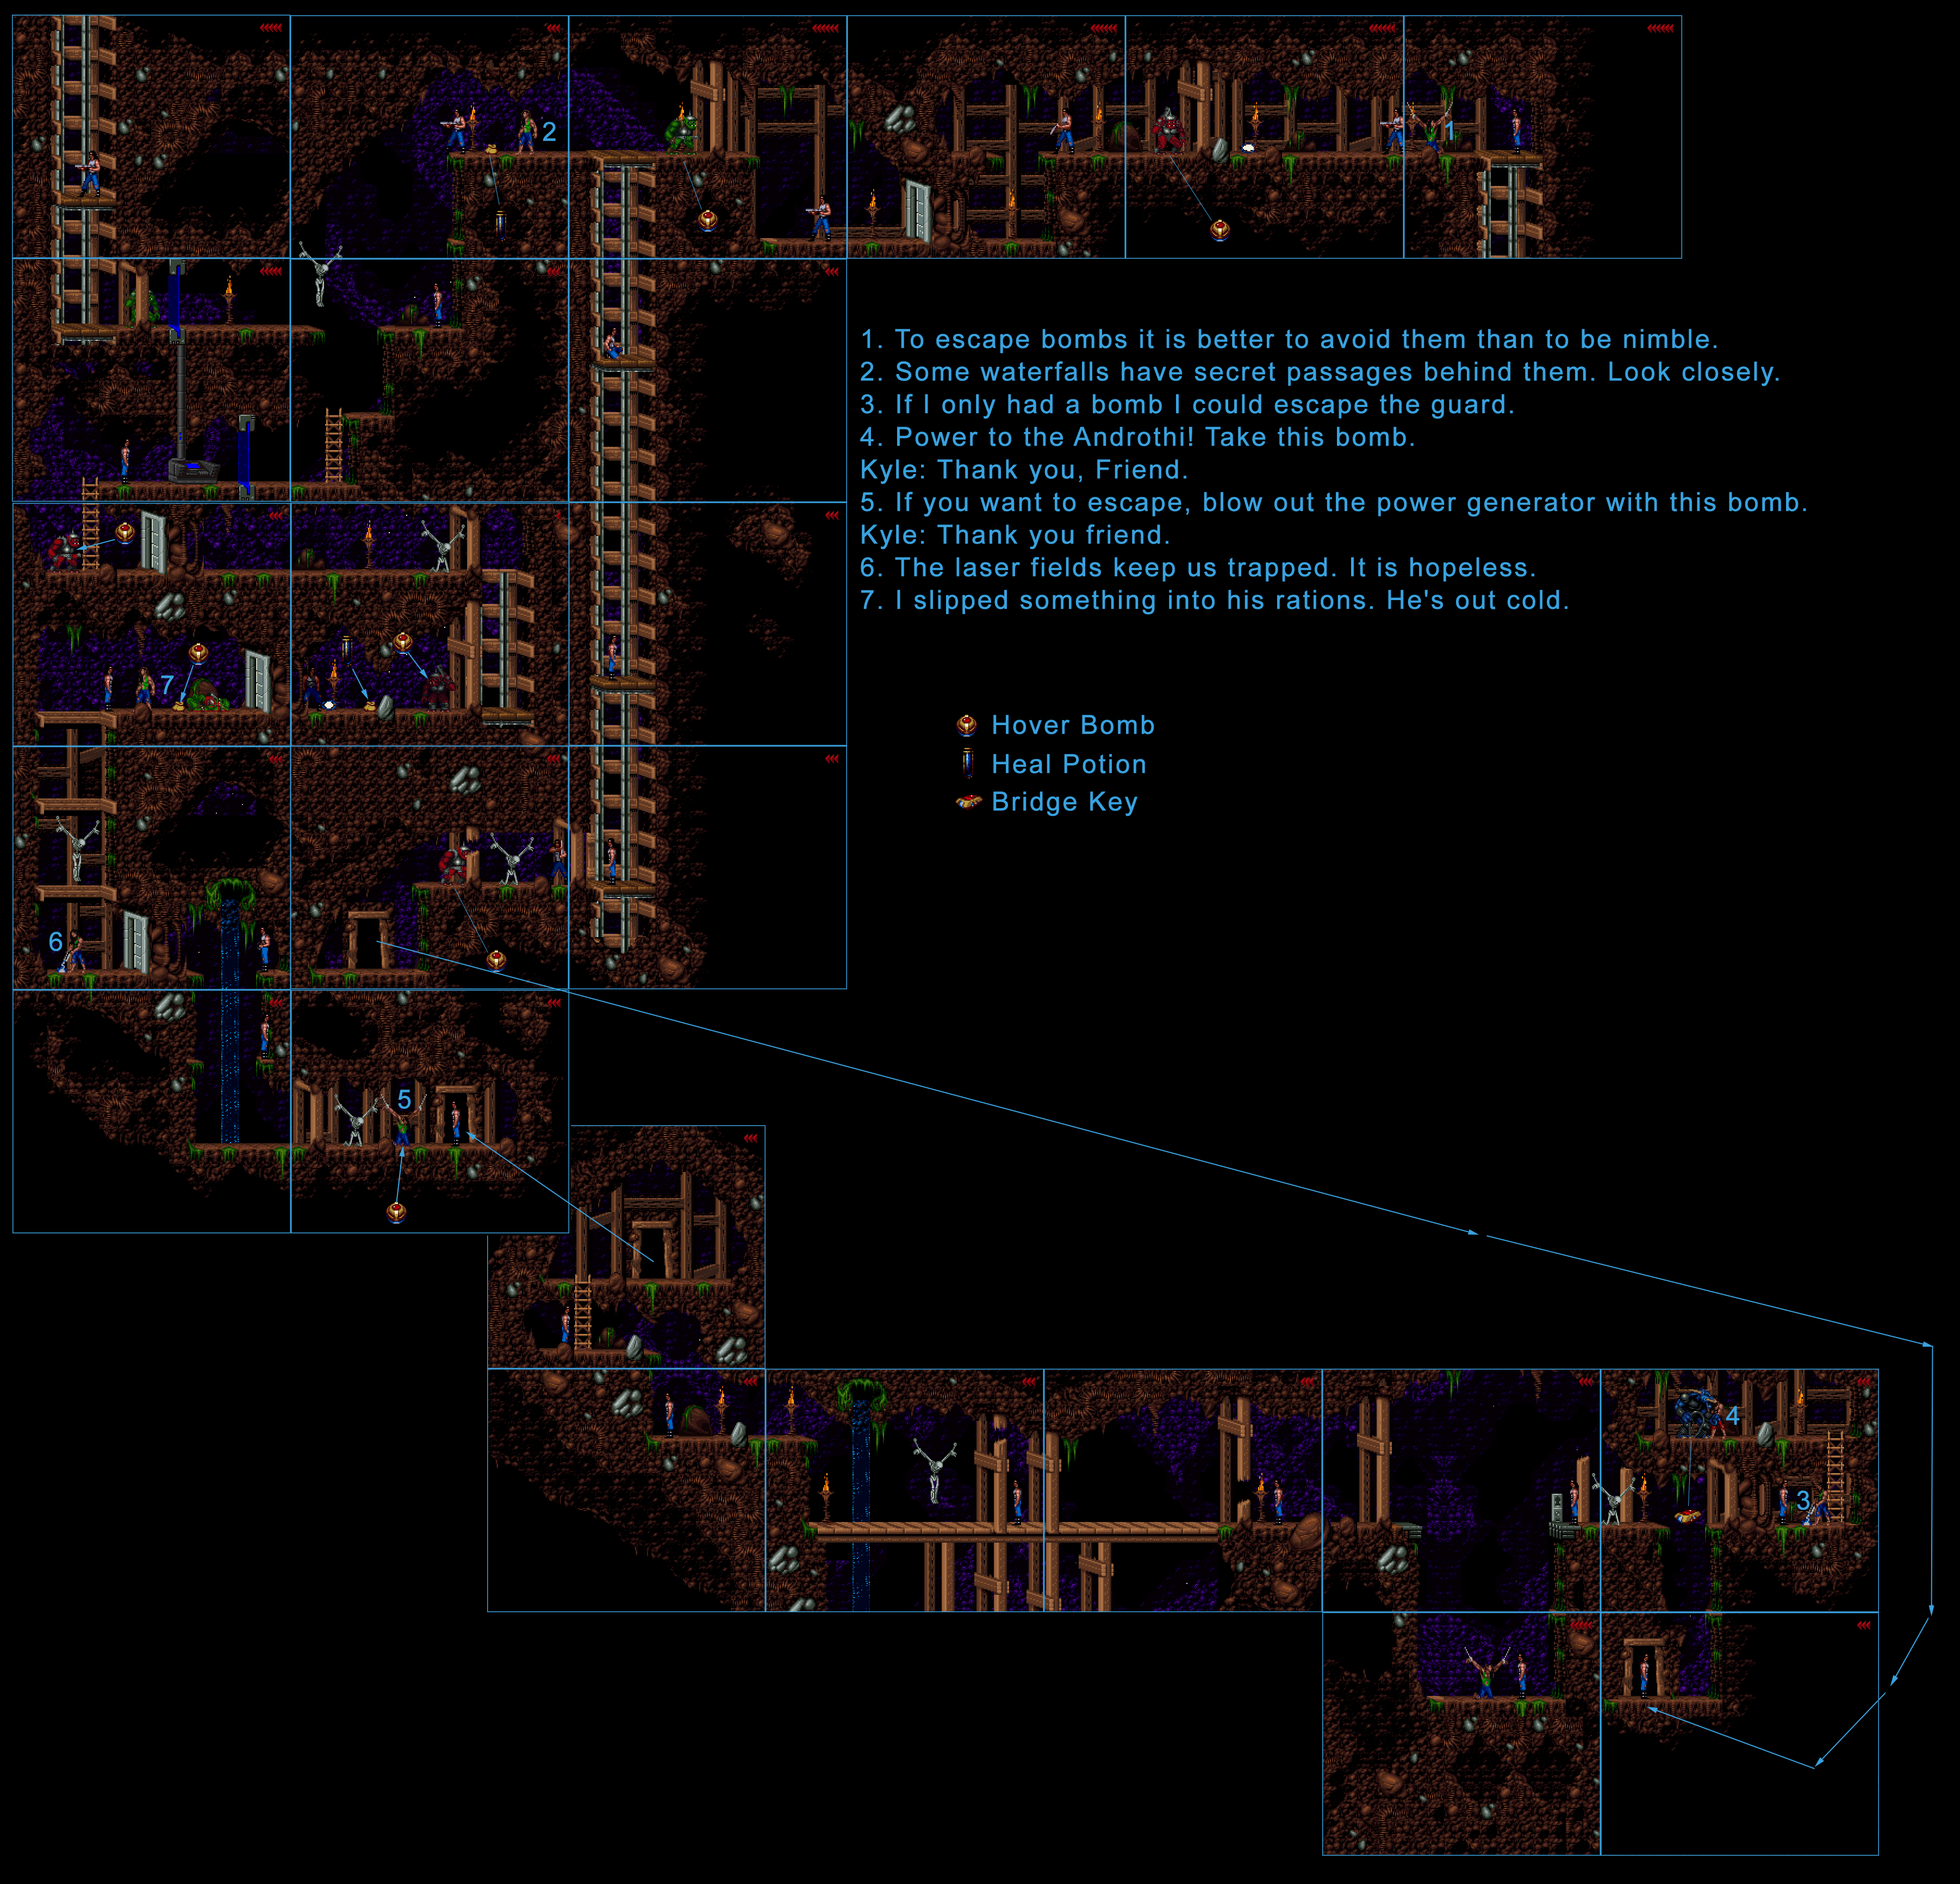
The image below shows the entire level 2 map. The player starts on the top-right corner of the image and moves from right to left. Keep moving left until you find the elevator. Move to the next room left of the elevator and kill the green Grag’ohr to reach the bag that is already on the floor. It has a heal potion. No need to keep moving forward because the path is locked by two laser doors. Go back to the elevator and press the Down arrow button to move the elevator.
You will find a red Grag’ohr throwing two Hover Bombs. Press the “UP” arrow to dodge them. Then wait until he shoots. Kill it. Press the “S” button to sheath away the shotgun, and press the UP button to enter the doorway.
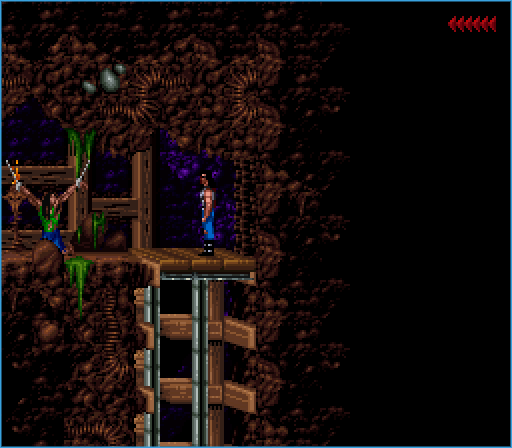
This door takes you to another area unrelated to the previous one. Climb the wall, and go right. Talk to the prisoner. He gives you the following tip for the next monster: “If I only had a bomb I could escape the guard.” In the image below, the prisoner is #3.
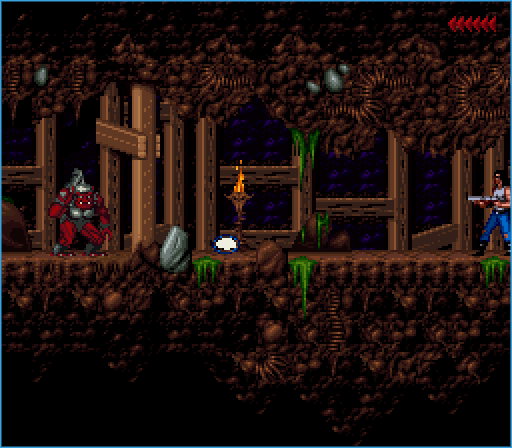
Above, the blue guard is a different race: a Whar’ork. It resembles a goat with large horns. He carries a whip. They don’t have guns, but the whip is used to hit Kyle from a distance. Bullets won’t kill them, so use the Hover Bomb. The Whar’ork dies immediately. Make sure to step on the bag he drops and press the DOWN arrow button to pick it up. It contains a BRIDGE KEY.
Go back down, and jump across the hollow area you climbed from earlier. However, move just one step forward. Not a lot of space in the next room as the bridge is turned off.
Stand on the keyhole area, and use the PAGE UP button to browse through your inventory. Use the BRIDGE KEY to activate the bridge. With the bridge up, press and hold down “D” while moving left to run fast. There is no guards for the next few rooms. Reach the doorway after climbing a few times. Sheath your weapon and press UP to enter the door.
The next room has a chained prisoner with a green shirt. In the image below you can find it tagged as #5. Talk to him. He will give you a HOVER BOMB, and a tip: Destroy the GENERATOR to disable the laser doors. Climb the wall and use a HOVER BOMB to destroy the metal door.
The next prisoner tagged as #6 in the map below, talks about the laser doors.
Climb up the wooden shaft above Prisoner # 6. There is another prisoner who managed to slip something on the guard’s rations and knocked him out. There is a bag on the ground. Pick it up. It is a HOVER BOMB.
Use it to destroy the metal door. Careful. Behind the door is a red Grag’ohr. He throws a HOVER BOMB on the ground that rolls toward you.
Press the UP arrow to dodge it, and wait until the red Grag’ohr shoots first. As he reloads, time it and kill him. He drops a HOVER BOMB, but there was already a bag next to the door which contains a HEAL POTION.
Use the elevator, then throw a HOVER BOMB at the metal door. There is another red Grag’ohr behind the door. Loot his HOVER BOMB. Go up the ladder and throw the HOVER BOMB at the GENERATOR.
Both laser doors become disabled now. Go up the ladder, and climb once. No need to move to the right because that’s where you originally came from. Just jump across (where the skeleton hanging off chains is) and take the elevator.
That is the exit which ends Level 2. Game Progress is saved.
Note: Hold down the right-button and choose “Open in a New Tab” to view the full size. It is a huge map.